
I not too long ago heard a photographer say he’d spent 17 hours going by 10,000 photos, deciding which of them have been price saving. My first thought was, “I hope he’s retired.” My second thought, although, was that he badly wanted a lesson on rushing up his workflow. Which led me to jot down this information on how you can turbocharge your images workflow.
I began capturing digital for my newspaper within the fall of 1996. By the spring of 1997, I’d been tasked with serving to convert all the division to digital. I rapidly discovered that the gear was the straightforward half. It was the workflow — downloading, organizing, renaming, including beneficial info to the pictures (names, areas, and many others.), after which with the ability to discover the pictures — that was the exhausting half.
Over the following half-dozen years, as I left my paper and started a contract profession, I carved out a distinct segment in serving to different newspapers make the transition to digital. And once more, gear was the straightforward half, workflow the problem. My perspective was that with computer systems and the best software program, photographers ought to be capable to deal with extra pictures extra rapidly than ever earlier than. However that wasn’t as straightforward because it sounds.

The 2 keys to any good workflow are that it’s straightforward to repeat and achieve no matter targets you’ve. In an organization, meaning it must be designed to suit the corporate’s wants, after which everybody has to observe it. Each of these may be difficult to perform when a lot of persons are concerned.
For a person, although, it’s a lot less complicated. I’m usually requested what my workflow is, and I’m comfortable to share it. However what actually issues is that it is smart to you and is straightforward to do. Listed here are the 5 fundamental steps that any photographer can (and will) take to make the method as painless and environment friendly as attainable.
1. Automate the Obtain
Computer systems are nice at automating issues, so why not have them try this? The most effective images functions on the market can automate the obtain course of. They will create a folder construction, title the folder(s), rename the pictures, and add necessary metadata (like copyright, location, and caption info).
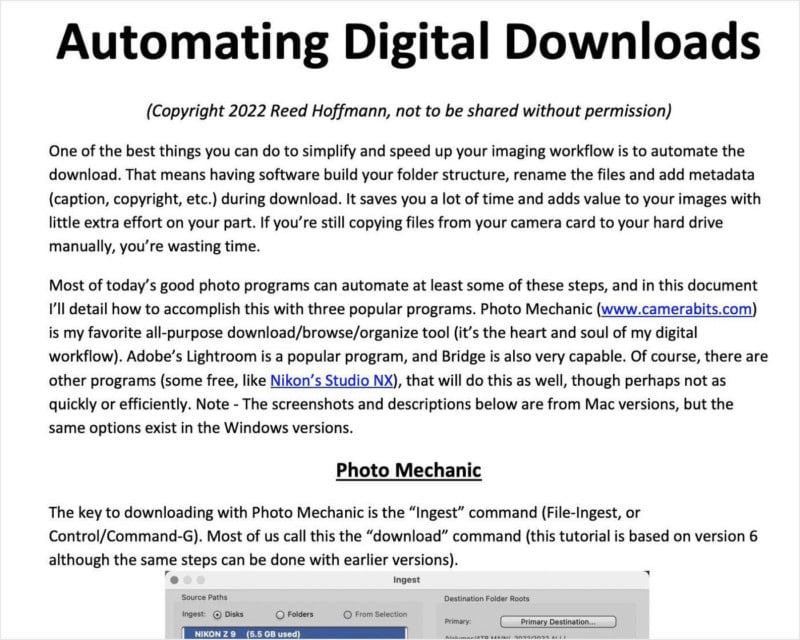
In case your workflow has you plugging the cardboard in, making a folder on the pc, and dragging the pictures to it, you’re not simply losing time, you’re making each step after that harder. For years now I’ve posted a PDF on my web site titled “Automating Digital Downloads” that explains, step-by-step, how you can accomplish this with Picture Mechanic (my favourite), Lightroom and Adobe Bridge. It covers all the things from folder construction to captions and renaming (which is crucial).
2. Preserve or Delete?
Within the early days of instructing workflow, one of many issues I all the time preached was, “Why waste time searching for unhealthy pictures?” That meant storage was low cost, so don’t spend time searching for pictures to delete. Obtain, discover your finest pictures, work them up and transfer on.
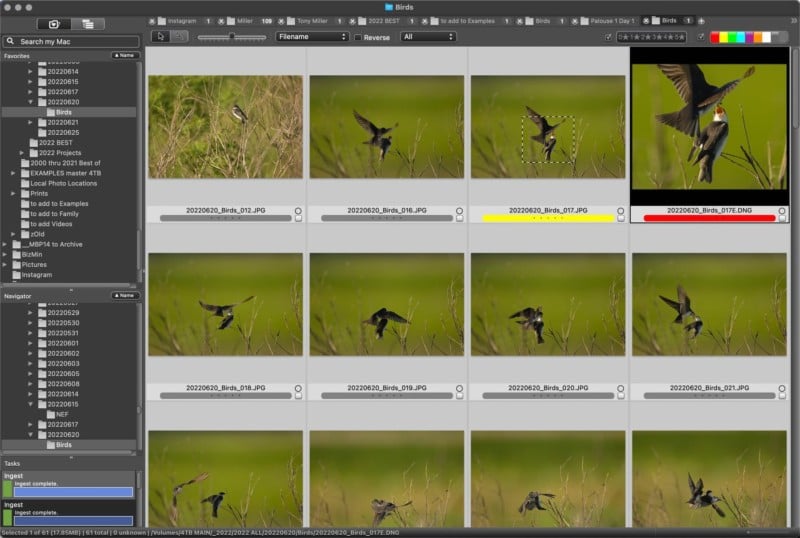
Then I obtained my first really high-resolution digicam, a Nikon D800 (36 megapixels). Taking pictures RAW, every time I pressed the shutter button I used to be making a file round 50MB in measurement… which made me change my tune and flipped that a part of my workflow the wrong way up. Now, after downloading, I nonetheless undergo and search for my finest pictures. However as I try this, I mark them (“tag,” “flag,” no matter your software program calls it). I’m overly beneficiant doing that, not photos critically and marking any picture I’ll have a attainable use for (I shoot a whole lot of “earlier than” and “after” pictures for instructing).
As soon as I’ve marked them, I inform the software program to pick the pictures I didn’t mark (“Untagged,” in Picture Mechanic phrases) and delete them. That implies that on most shoots, I find yourself conserving about 25% of what I shot. Going by 1000 photos takes me lower than an hour.
3. Grasp Information
The objective right here is to all the time work in your photos non-destructively, that means the unique pixels stay untouched. That could possibly be by a catalog program (like Lightroom or Mylio), the place the edits are digital, or saved with Layers or as a DNG file (with extra conventional modifying packages, like Photoshop or Adobe Digicam Uncooked). All of these imply that no matter you’ve completed may be undone simply, permitting you to go backwards or forwards with out beginning another time, from that “Grasp” file.
If utilizing a catalog program, then it’s best to have a approach of marking your easiest photos (colour or quantity ranking) to allow them to be simply looked for and located. For those who use a folder-based workflow (like I do), then these finest photos needs to be saved as PSD or DNG information. In that case, for me, it is smart to avoid wasting these “Grasp” information again into the folder with the RAW or JPEG originals.
4. Create Smaller “Finest Of” Collections
Clearly, any time it’s good to discover one in every of your finest pictures, you don’t need to search all the archive. Really easy entry to smaller units, or collections of photos, is necessary. And as soon as once more, the way you do that will rely upon whether or not you utilize a catalog system or folder-based (like with Picture Mechanic or Bridge).
Catalog. Lightroom calls this skill to group digital photos collectively “Collections.” The benefit of a catalog is that you just solely want one unique. You’ll be able to then have as many digital copies of that picture in as many various collections as you want with out copying it time and again. The drawback is that it’s good to be very cautious to maintain that catalog, in addition to the unique information backed up in a number of areas. In any other case, a tough drive failure or different loss could possibly be catastrophic, since all of the work you’ve completed lives in that catalog.
Folder-Based mostly. However, a folder-based system implies that as you create completely different collections, you’re copying that unique (and edited model) to a number of areas, which robotically creates a number of backups. The benefit right here is that these unique information dwell in a number of completely different locations. The drawback to this method is that it requires extra storage capability (exhausting drives).
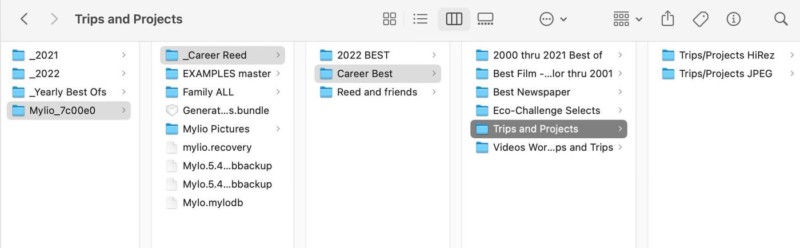
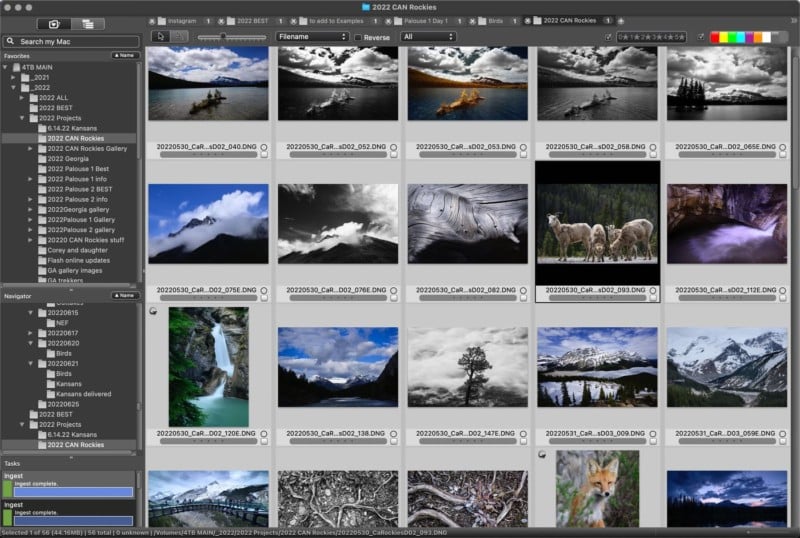
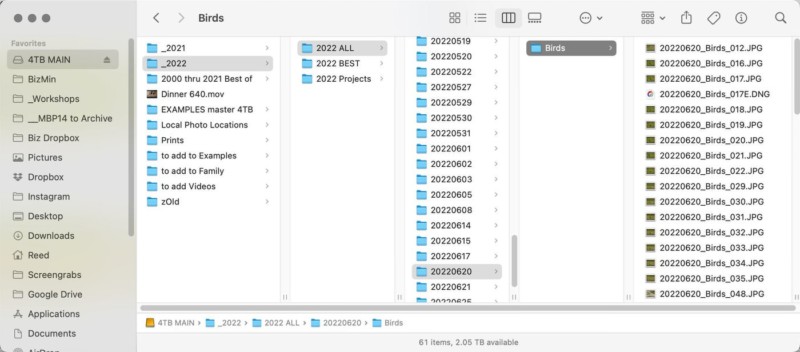
No matter which system you utilize, creating smaller collections of your finest photos will make it a lot simpler to search out those you need, rapidly. As an example, proper now I’m constructing a “Better of 2022” for my easiest pictures from this 12 months. I even have a “Better of 2000-2021” which is the cream of the crop from every of my yearly “Better of” collections. And in early 2023, I’ll choose the easiest from 2022 and add them to that bigger assortment, then change the title to, “Better of 2000-2022.” That is how my system appears to be like proper now:
- 2022 ALL. Accommodates dated folders for on daily basis I’ve taken footage this 12 months.
- 2022 Better of. Each couple of months I’m going by my current shoots and add some pictures.
- 2022 Journeys. I create “better of” collections from each journey or workshop annually. Thus far:
- 2022 April Georgia
- 2022 Might Palouse 1
- 2022 Might Palouse 2
- 2022 June Canadian Rockies
5. Storage and Backup
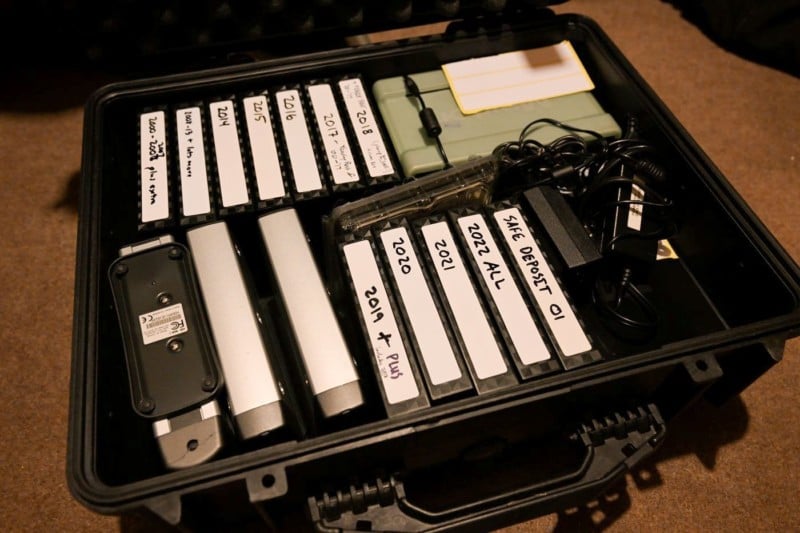
Each time I’m requested what number of backups individuals ought to have, my reply is all the time, “Nevertheless many allows you to sleep soundly.” In different phrases, there’s no magic quantity, simply no matter makes you are feeling comfy your pictures may survive a catastrophe. However the rule of three is an effective beginning place. One copy in your main exhausting drive (I exploit a RAID array, mirrored, as that main drive). One copy on a second exhausting drive you possibly can join and backup to repeatedly (in different phrases, at dwelling). And a 3rd exhausting drive that’s stored off-site, whether or not at a buddy’s dwelling, an workplace, or a protected deposit field, which you can simply carry dwelling, again as much as, after which return to that off-site location.
In case you have high-speed web, then making the most of a cloud possibility is a good suggestion as nicely. Nevertheless, contemplating the period of time it will take to obtain all the things from the cloud, I hope to by no means want it.
The second a part of backup is to ask what you really want backed up. In any case, ought to my dwelling be destroyed, I don’t care about recovering each photograph I’ve ever taken, simply the perfect ones. My backups concentrate on these best-of collections (and that’s what I again as much as the cloud as nicely).
And considering long-term, previous my lifespan, what pictures are really an important? My household pictures, not my profession ones. In order that assortment/folder is the one I put the best precedence on. I need to be certain that my youngsters have these pictures as soon as I’m gone.
Keep in mind, the important thing to any good workflow is that it really works for you. For those who wrestle to observe a routine another person recommended, that’s not a great workflow. Sit down with a sheet of paper and begin sketching out plans till you discover one which seems like a great match. Set a date that you just’ll begin utilizing that plan. Then make an inventory of these steps, put it subsequent to your laptop, and begin following them each time you obtain and work on pictures from that date ahead.
In time, it’ll turn into second nature. What about your older pictures? There’s no motive you possibly can’t return and begin shifting them into your new workflow (collections/folders, renaming, batch captions, and many others.) when you’ve time. It’s largely about higher group.
For those who’re doing images for enjoyable and discover the workflow half painful or irritating, you’re doing one thing flawed. And in my expertise, more often than not that ache comes from a poor workflow. Repair your workflow, then begin having enjoyable with images once more.
A Notice About Picture Mechanic
I’ve outlined what I contemplate a great, fundamental workflow above. My private one incorporates all of that, however I’m going to take a second now to clarify why my main instrument for reaching it’s Photo Mechanic.
After I began capturing digital in 1996, I used to be utilizing a Kodak DCS digicam (a transformed Nikon N90s physique) and Kodak software program that was clunky at finest. Enter Dennis Walker. He began a small firm, Camerabits, and created a a lot better software program answer for dealing with these picture information, Picture Mechanic.
As information organizations around the globe transformed to digital, all of them additionally adopted Picture Mechanic. A browser, not a picture editor, it was that key step between the digicam and Photoshop that took care of the obtain, captioning, renaming, and organizing/sorting, amongst different issues. It was (and nonetheless is) the quickest program (that I do know of) for doing that, which is why each information group I do know of nonetheless makes use of it.
When individuals ask me why I exploit it as an alternative of one thing else, I clarify that it’s the hub of my digital workflow, so pace is important. Each picture I shoot comes into my system by it, is managed with it, and goes out by it. I spend extra time in Picture Mechanic than with another piece of software program, and have used it so lengthy it’s second nature.
There are keyboard shortcuts to about something you’d need to do — I solely want the mouse once I need to click on a particular space to test sharpness and zoom to 100%. And that’s the place one of many huge pace positive aspects occurs, when zooming. For those who shoot RAW, if you click on a picture to get a bigger preview (or zoom), most software program takes a second to course of that RAW information. Picture Mechanic doesn’t. It merely takes the JPEG that’s embedded in each RAW file and makes use of it for the preview/zoom. That, after all, is far quicker than processing the RAW information.
Take into consideration what number of instances you have a look at a preview of photos, or zoom in. For those who’re saving one or two seconds every time you try this, it provides up rapidly. Merely stated, it’s the perfect, quickest program I’ve ever discovered for managing photos.
Right here’s my fundamental workflow:
- Put card in reader, Ingest (obtain) with PM, having it create folder construction, caption and rename.
- Flick thru pictures, “tagging” (“t” key) all that I need to maintain.
- Invert the choice (“Choose untagged”) and delete.
- Undergo a second time, now marking my favorites with a yellow mark (“2” key).
- Kind by “Shade Class” to view these photos.
- Zoom to 100% to test sharpness (“z” key), discover the easiest and provides them a purple mark (“1” key).
- Use the “e” key to launch any of these photos into Adobe Digicam Uncooked (set in Preferences) to edit, saving again to the unique folder as DNG information (non-destructive, edits intact).
- Use Cmd/Ctrl-S to avoid wasting any of these photos out as JPEGs at no matter decision I would like for Instagram, Fb, or another use requiring JPEGs (and PM can convert the colour house to sRGB on the similar time, which is necessary as a result of I shoot in AdobeRGB).
- At a later time, I’ll use Cmd/Ctrl-Y to repeat any favorites to the “2022 Better of” folder.
What else do I do with Picture Mechanic?
- Create galleries for my web site.
- Open photos into different modifying packages (DxO PureRaw 2, PhotoMatix Professional, Nikon NX Studio, and many others.).
- FTP photos to numerous purchasers.
- Run slideshows.
- Burn photos to disc (CD, DVD, Blu-ray).
- Import and embed GPS coordinates.
- Present on a map the place these pictures have been taken.
- Use Code Replacement (automates the enter of names/groups/numbers in sporting occasions) when doing work for wire companies.
- Handle/change Metadata/IPTC info like Key phrases.
- Search even giant folders of photos (1000’s) rapidly.
- Kind by virtually any standards conceivable, from ISO to decision to digicam to focal size…
- Change seize dates and instances (if I didn’t set the digicam correctly when touring).
- Create “Snapshots” to additional automate issues like captioning, renaming, gallery creation, FTP transfers, and many others.
- Have a number of contact sheets open on the similar time.
- And there’s a lot, far more.
For those who don’t take a whole lot of footage, or do a lot with them, then you definitely most likely don’t want Picture Mechanic. However if you happen to do, and aren’t comfortable along with your present system, then you definitely would possibly need to give the 30-day free trial a go. It’s not for everybody, but when it really works for you prefer it does for me, it’s nicely price the fee (and is repeatedly up to date with out asking for extra money).
In regards to the writer: Reed Hoffmann is a photographer and images teacher who has been within the photograph trade for many years and who has used each Nikon DSLR (and taught most of them). The opinions expressed on this article are solely these of the writer. Observe together with Hoffmann’s newest workshops here. You may also discover extra of Hoffmann’s work and writing on his website, Facebook, Instagram, and Twitter. This text was additionally printed here.