")


For those who’ve been on-line in any respect, you have most likely seen many of those movies circulating the place there are shape-shifting and morphing objects, in very surreal, eerily fluid scenes. Typically they’re extremely fluid, however different occasions they could appear clunky, or complicated. What you are seeing is a course of often known as AI Body Interpolation. Interpolation, within the context of video and animation, refers back to the strategy of producing intermediate frames between two photographs or frames to supply a smoother transition. This system is very helpful in enhancing the fluidity of animations or movies, particularly when the unique footage may be missing in body charge or when making an attempt to create a clean transition between two distinct photographs.
Leap to content material on this part
Introduction
Body interpolation may be visualized as filling within the gaps between two frames. Think about you may have a sequence the place a ball strikes from the left facet of the display to the proper facet, and again in a number of frames. Naturally, this is able to not seem clean for those who simply positioned the frames subsequent to one another in a timeline. Nonetheless, that is the place the ability of video interpolation may be seen. See this video instance:
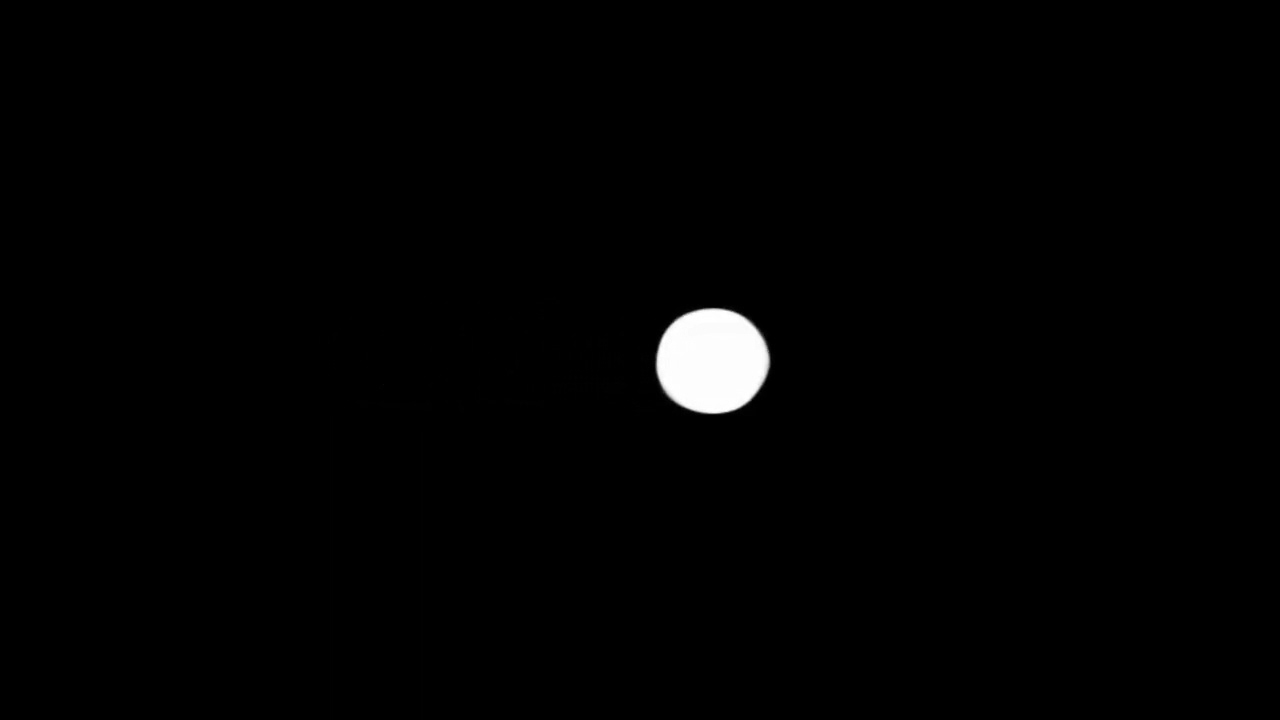
The video above may seem like a easy video of a white ball shifting throughout a black background, however it’s a lot extra. What you are seeing right here was generated utilizing 9 totally different unbiased frames. RunwayML’s clever AI system created frames in between to create a fluid video as you’ll be able to see with this screenshot of the enhancing platform.


White ball video frames for AI video body interpolation tutorial
With interpolation, you’ll be able to generate further frames the place the ball seems at numerous positions between the beginning and finish factors, making the motion seem smoother.
The purposes of AI interpolation are huge. They can be utilized in video enhancing to make excessive frame-rate movies from normal frame-rate footage, in animations to create smoother transitions, or in any situation the place there is a must bridge the hole between two frames or photographs.
Runway has not too long ago launched its interpolation toolset, and I am excited to display the various vary of purposes it provides. Surprisingly, there are way more makes use of for this expertise than one would possibly initially assume! On this tutorial, I will probably be conducting a science experiment with you.
The frames I’ll use are from video footage I obtained from Envato Elements. Envato Components provides entry to tens of millions of distinctive, high-quality images, photographs, audio, movies, and extra. For those who want to comply with together with this experiment, please discuss with the part under.


I’ll display the unique video footage, showcase the frames I will probably be utilizing, let Runway try to create the intermediate frames, and eventually, we will evaluate the unique video with the AI-generated video utilizing interpolation from Runway. If you wish to comply with alongside you’ll be able to comply with these steps to attempt it out for your self! If you have already got your body’s that you will be utilizing you’ll be able to skip to the interpolation settings portion of the information.
Earlier than delving deeper, I might like to handle a standard concern: the perceived “clunkiness” or choppiness typically related to movies using this expertise. It is essential to notice that these noticeable cases are only a fraction of the general use circumstances for interpolation. In reality, many purposes go utterly unnoticed resulting from their seamless execution. Body interpretation outcomes do not must be exaggerated; actually, they could be a highly effective instrument for creating movies with refined, but impactful, motion. If in case you have a collection of quickly captured images, leveraging interpolation can create smoother movies by intelligently “filling within the gaps” between every body. Subsequently, the extra frames you may have at your disposal, the higher the result may be.
Elective – Acquiring the Pattern Video from Envato Elements
To profit from RunwayML’s options, it is advisable to start out with a high-quality video. In my case, I will start with a video so I can display the excellence between a accomplished video and a model generated utilizing frames from the unique footage. This system will present a visible illustration of how interpolation differs from conventional videography.
For those who’re in want of a video, you’ll be able to go to Envato Elements, a platform providing tens of millions of photographs, movies, music, and extra. If you have already got an Envato Components account, you’ll be able to make the most of these sources in your ongoing tasks, supplied you appropriately doc your utilization, as I will define under.
For those who already possess your video clip, be happy to proceed to the following part.
Step 1
Go to Envato Elements


Step 2
Click on on the ‘All Gadgets‘ dropdown, then select ‘Stock Footage‘.


Consumer choosing Inventory Video for AI body interpolation tutorial
Step 3
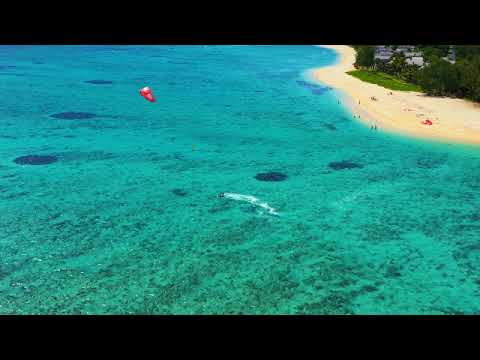
I will simply discover one thing with numerous movement, by trying to find ‘Surfer‘. Click on on the thumbnail video of your video of alternative. For this one, I am selecting ‘Kitesurfing Le Morne, Mauritius. Drone view…“.


Step 4
The following display you may discover is a display to obtain the video footage. Click on on ‘Obtain‘.


Step 5
Subsequent, you may must assign the obtain to a particular undertaking. This lets you freely use the footage in your undertaking. On this case I am typing “Tuts+Work“. You may title yours no matter you need.


Step 6
Click on on ‘Add & Obtain’.


Consumer including an outline for downloading video for video interpolation information.
Step 7
It can save you the file wherever you favor.
This is the finished/supply video I downloaded, which can function our place to begin:

TIP: Creating Moments from Pictures: If in case you have a number of images taken in speedy succession, body interpolation can flip them right into a clean video sequence.
Step 8
Now, let’s trim a number of frames from the video for our experiment. To do that, I simply press the ‘prt sc‘ button on my keyboard, and save the display shot to a file within the appropriate order. I will play the video on my pc and seize screenshots at related moments. Listed below are the preliminary frames I’ve captured:


Step-by-Step Tutorial: Utilizing Body Interpolation with Runway
TIP: Understanding the Fundamentals: AI picture interpolation can be utilized to create surreal scenes with shape-shifting or morphing objects. Nonetheless, its purposes usually are not restricted to excessive results. It could actually introduce refined actions in movies, making nonetheless photographs seem dynamic.
Step 1
Get began head over to ‘runwayml.com‘.


Step 2
If that is your first time, you may must click on on ‘Signal Up – It is Free‘ Button.


Consumer clicking the Signal Up Button for AI picture interpolation tutorial
Step 3
There are a number of methods to do that, however we’ll begin with accessing the Runway ai video Body Interpolation Device immediately. After getting registered with the Runway website, you will want to pick out the Body Interpolation mannequin. To seek out it click on on ‘View All Instruments‘ textual content close to the highest.


Consumer clicking View all Instruments possibility for AI body interpolation tutorial
Step 4
Utilizing the Runway AI video instrument, Click on on the ‘Body Interpolation‘ button. This can take you to the Interpolation Settings Display screen:


Step 5
Subsequent, add your enter photographs and specify your required variety of output frames. For the sake of this tutorial, I will be utilizing a number of frames as I discussed earlier within the elective directions part. For those who’re unsure what I imply, scroll as much as the part titled: ‘Elective: Acquiring the pattern video from Envato Components.‘ It’s possible you’ll must rearrange the frames to get them in sequential order.


Step 6
Lastly, modify your ‘Clip Period‘ to no matter you want to. As a result of I wish to attempt to preserve issues much like the unique video to have the ability to evaluate, I will preserve the whole time between frames to about 3 seconds, which ought to get it to the approximate size of the unique video.
Step 7
Click on ‘Generate‘.


Consumer clicking ‘Generate’ button for AI picture interpolation tutorial
Step 8
After you render it you’ll be able to attempt totally different ‘Clip period‘ settings to see for those who get extra fascinating outcomes. I ended up settling for “35.5s“, and I have to say I am fairly impressed.
Step 9
Whenever you’re pleased with the outcomes, click on on ‘Export‘ button to obtain your file.


Consumer clicking the ‘Export’ Button for AI video body interpolation tutorial.
Step 10
The following menu is the place you’ll be able to affirm your settings earlier than downloading.


Right here is the ultimate consequence from our experiment:
Now you’ll be able to evaluate the outcomes of our experiment to the unique footage and see for your self the probabilities with Interpolation utilizing Runway.
As beforehand talked about, the outcomes obtained from AI video body interpolation don’t essentially must be overly dramatic. By rising the variety of frames, you’ll be able to obtain smoother transitions within the interpolation course of. Sustaining refined variations in your frames can considerably improve the output high quality. In consequence, Runway can keep away from interpolating giant motions. Body interpolation synergizes successfully with different instruments out there in Runway.
Body interpolation may be mixed with instruments and methods like “erase and change”, “Shifting Composites”, and numerous others. For the sake of this text, we’ll be diving a bit of bit into these two, and we might love to listen to your suggestions on different methods you’re utilizing AI body interpolation in your tasks!
Use body interpolation with Erase and Change.
Erase and Change is a superb instrument to be mixed with Body interpolation as a result of you’ll be able to generate variations of 1 picture and mix them to create attention-grabbing morphs between objects within the picture.
Get Began with Erase and Change for the interpolation of frames.
Step 1
Return to the primary apps display in Runway, and select “Erase and Change“.


Consumer selecting Erase and Change for AI body interpolation tutorial.
Step 2
Add your required picture. Begin with one thing easy, like a single merchandise on a desk.


Display screen shot of sphere picture in Runway dashboard for AI video interpolation tutorial
Step 3
Spotlight the item you wish to manipulate, and supply a easy immediate within the immediate editor on the backside of your RunwayML Window. Whenever you’re prepared, click on ‘Generate‘.


Step 4
After you click on ‘Generate‘, Runway provides you with a number of choices to select from. As soon as you have discovered the one which suites you, click on on ‘Settle for‘.


Step 5
So, now you may have two ‘Variations‘ of a picture, and now you can use the earlier directions within the part “Step-by-Step Tutorial: Utilizing Body Interpolation with Runway” to create a morphing impact between them. Head over to the ‘Body Interpolation‘ instrument, and load-in your two photographs.


Consumer loading in two photographs for AI interpolation tutorial
Step 6
After clicking on the ‘Generate Button‘, you may have a brand new masterpiece , which can seemingly, and nearly magically morph one object into one other one in entrance of your very eyes!

This has so many use circumstances. Think about a shot with mountains within the distance, erasing elements of the mountains and producing a barely totally different mountain picture can create an impact the place the mountains look like “alive” when interpolated, or a tree rising from a seed. The choices are limitless!
Creating Shifting Composites
AI picture interpolation can be utilized to create a composite video from a number of photographs to create the phantasm of motion. Instance: Take a photograph of a airplane and two comparable photographs of clouds.


Step 1
Composite the airplane onto every cloud picture, making certain slight variations between the 2 composites. Then head over to the Interpolation applet in Runway and cargo in your new distinct frames. Then, lastly, proceed together with your era.


Step 2
Interpolating these photographs can produce a serene video of a airplane taking off from the bottom and flying amidst the clouds.
Right here is the finished video utilizing this methodology:

These shifting composites can be utilized a myriad of various methods that may add depth and engagement together with your last video merchandise. You may create layers of motion with objects overlaid onto different footage to create hyperrealistic video pictures utilizing this similar strategy.
Embrace Exploration and Creativity
The Body Interpolation Characteristic of Runway ML supplies extra than simply visually interesting outcomes. It invitations you to embark on an thrilling journey of experimentation and play, the place you’ll be able to discover countless prospects with totally different photographs and sequences. Numerous creators have already achieved outstanding outcomes by body interpolation, and now it is your flip to unleash your creativeness and craft your personal extraordinary masterpieces.
Conclusion
Body interpolation, as demonstrated with Runway, is a strong instrument for video creators and editors. It bridges the hole between nonetheless photographs and movies, providing a singular method to deliver static photographs to life. Whether or not you are aiming for refined actions or extra pronounced morphing results, body interpolation supplies the pliability and creativity to attain your required outcomes. As with every instrument, the hot button is to experiment, mess around, and uncover new methods to inform your story. So, dive in, and let your creativity soar with body interpolation!


